
USB Memory Update
Download NDS Firmware

Download the ISO installation file from the home page.
Create USB Image
Create a USB image using the Win32DiskImager program.
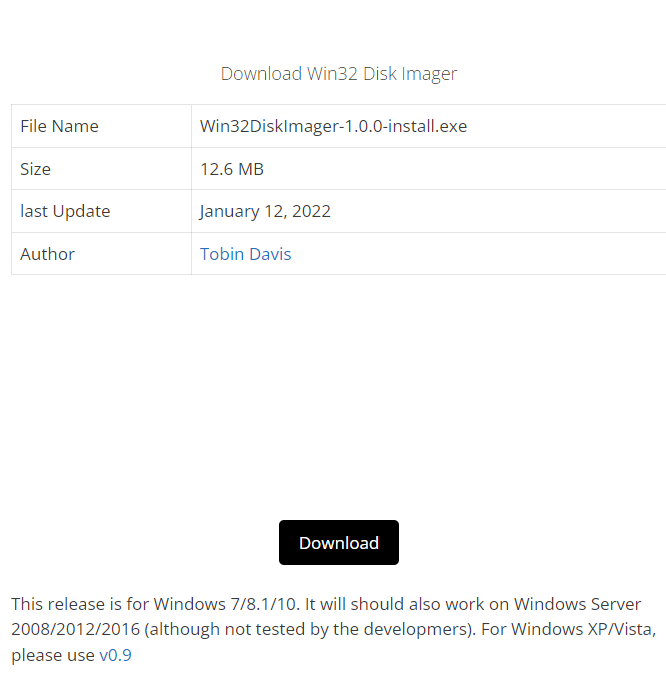
Download the program : https://win32diskimager.org/#download
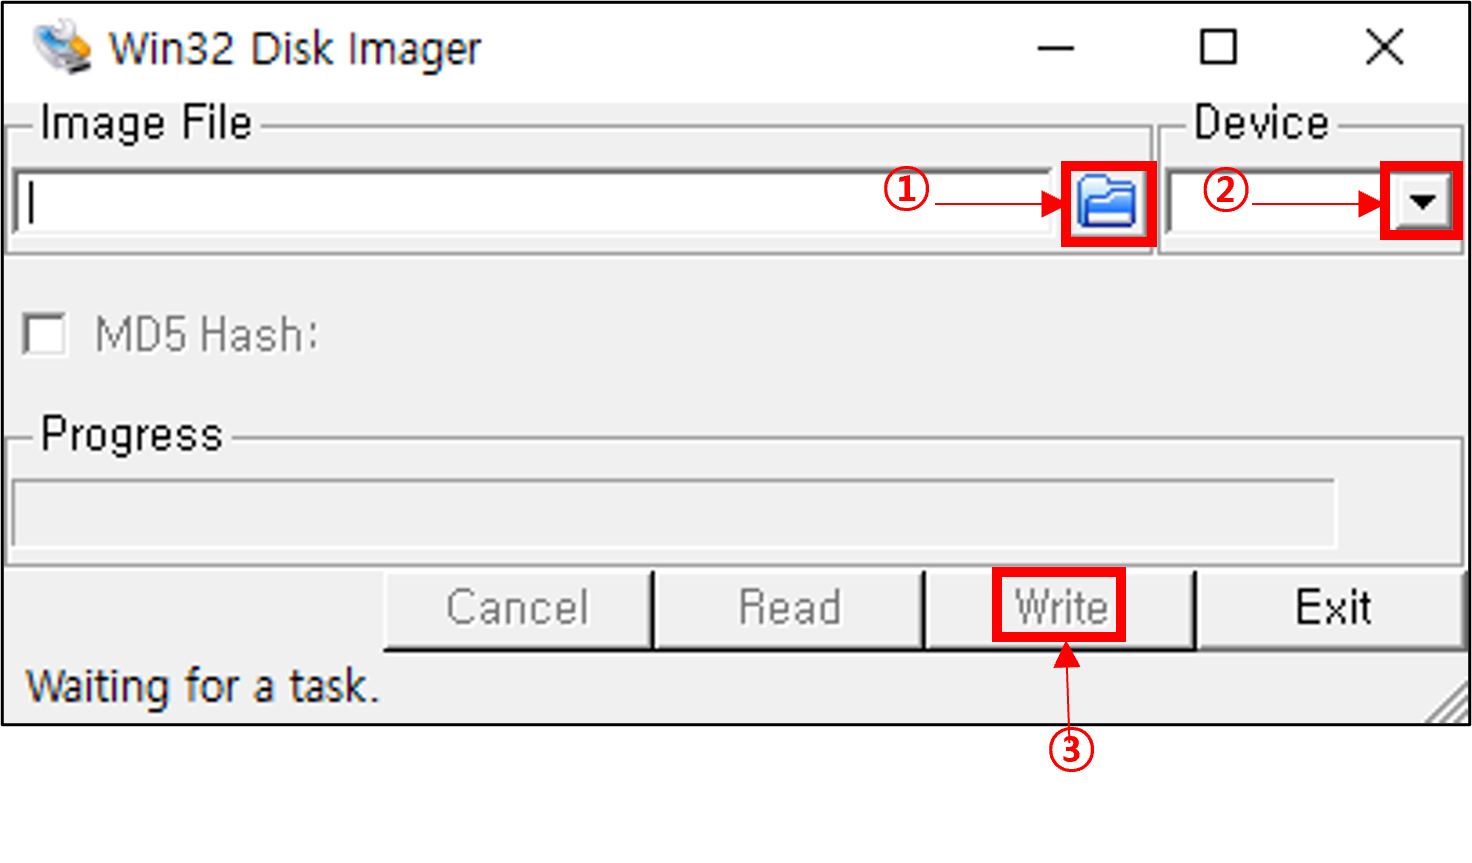
Select the ISO file that you downloaded.
Specifies the inserted USB drive. * Caution: All contents of the selected drive will be deleted, so please move and save existing data.
Press the Write button to image the USB memory.
Info
USB memory imaged through Win32DiskImager is not recognized as a drive by Windows PC. It can be recovered using DISKPART or Rufus programs.
Boot to USB
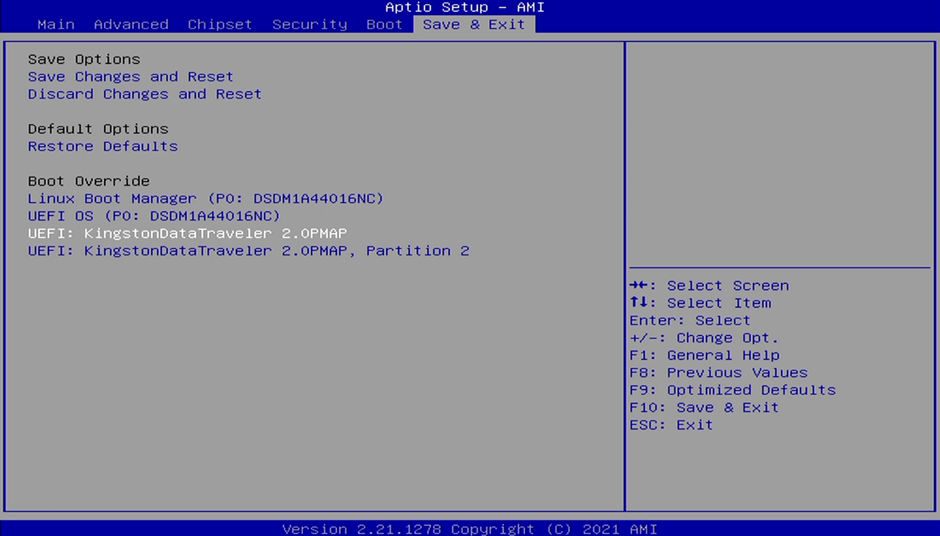
Connect the USB memory you created with Win32DiskImage to the NVR/VMS and press the "Del" key at boot to enter BIOS mode. If you check and select the USB connected in the Save & Exit menu, it will boot to USB.
Firmware Update
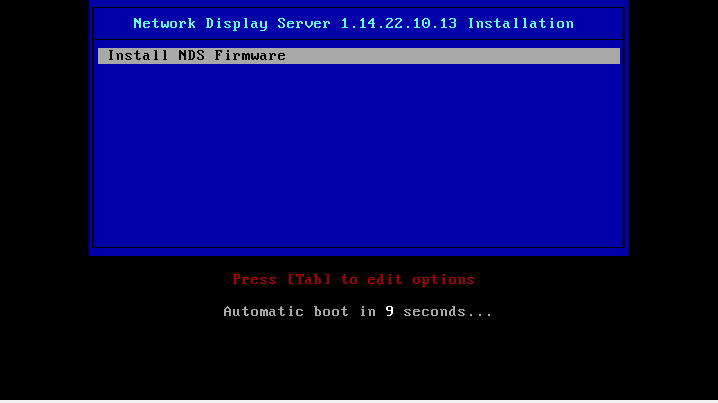
If you select "Install NDS Firmware", the firmware update will proceed.
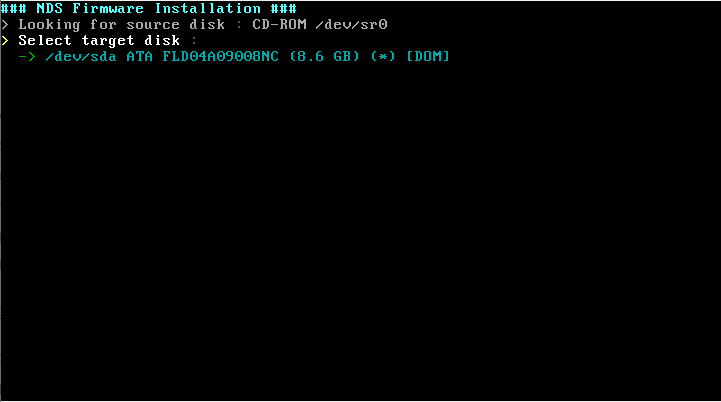
This is the drive selection window to install. You can select the DOM-SSD drive installed on the NDS.
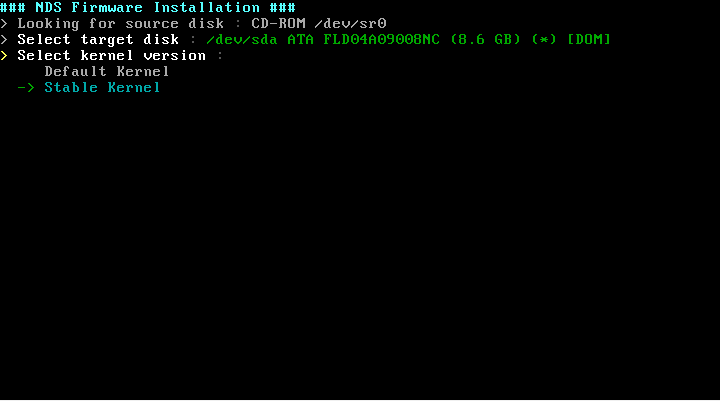
The kernel is automatically recognized according to the motherboard. ※ For your information, from January 2022, NDS Solo models will use MH-ITX-EMS10 motherboard.
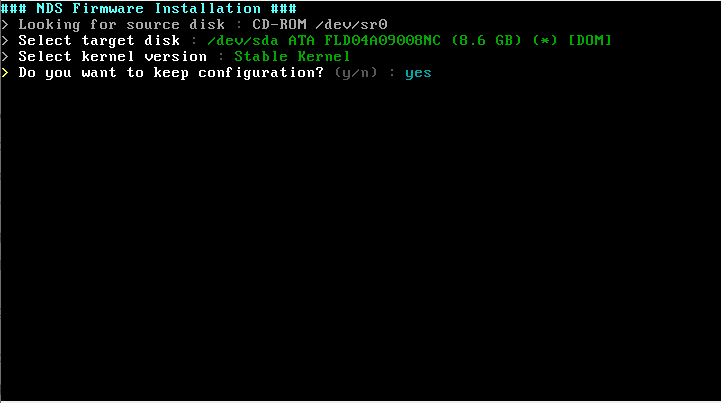
The window to choose whether to retain the currently saved settings. For simple firmware updates, select "yes" and "no" if the network is misconfigured or requires factory initialization.

This is the installation complete window. Please check the ###FirmwareInstallationCompleted ####, remove the installation USB, and press "OK" to reboot.
Recovering USB Memory
The imaged USB can be recovered with DISKPART or Rufus programs.

Last updated
Was this helpful?